Grand Tulips! (or- Forever Spring!)

36"x36"x2.5" contemporary deep profile canvas
To purchase, or for more information, click here.
So far, "Forever Spring" is in the lead for 'name this painting' (a poll I was taking on FB & Twitter). Usually the name of a painting evolves in my head as I'm working on a painting. Sometimes the name comes first and the painting follows.
Here's how this one began, on a chilly Spring day, when I brought a load of fresh tulips into the studio, and I had this wonderful canvas that I was saving just for a big batch of flowers like this:

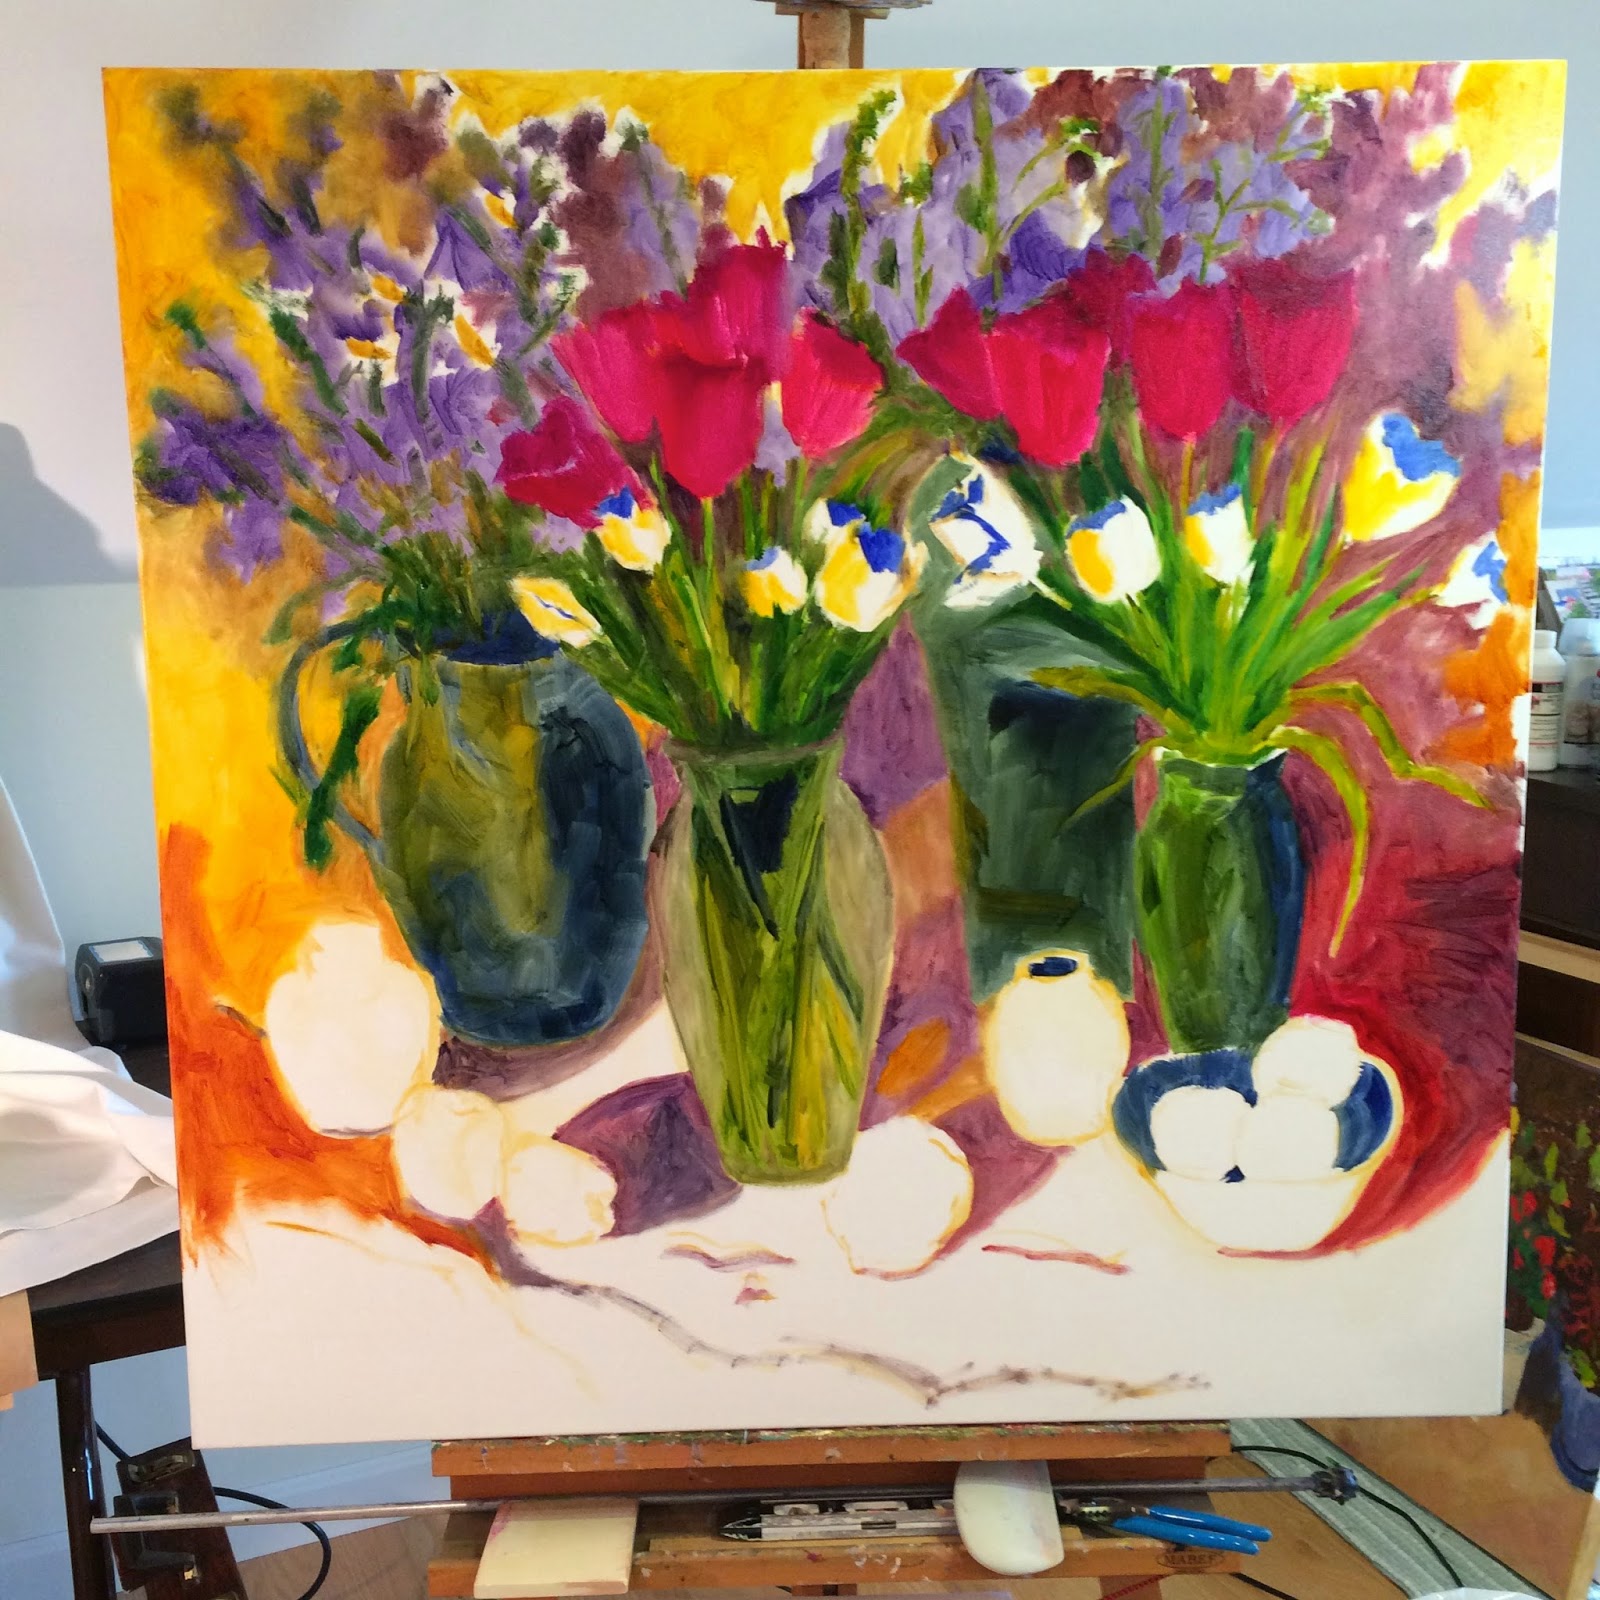
I adjust my lights, and place everything how I'd like it. Then I just sit and look at it, and consider how I'd like these shapes I'm seeing to fit into that large square shaped canvas. I squint down...which helps to eliminate color, so that you can see 'value'- the darkness vs. the lightness of each area of your design & how it relates to each other. As I'm looking at these items, I'm also considering the main colors I want in this composition. I decide that instead of these red delicious apples, they are going to be Granny Smith apples, as I'm thinking I want that particular green. I've chosen green to be the dominant color in this composition with fuchsia red tulips as my focal point, particularly the one with the bit of orange-yellow on the stem...which is just enough of a contrast against all those blue flowers for a nice spark. One thing that I've brought into my paintings over the years is the avoidance of 'rendering'. I prefer more of an 'interpretation' so that I might control color and design rather than be slave to what I see in front of me. Arranging a still life to work from has become the 'jumping off point' from which my paintings progress.
Anyway, once I draw in (with paint) the basic placement of each element in the painting, I being the under-painting.


If you're a painter, and would like to learn some more of these methods, consider joining in on my "Mentoring Mondays" during the month of March. I'll talk more about them in detail in the next blog post. I have a limited space in my studio for students, so it's definitely first dibs gets the space! Right now there is room for YOU!
Here are some additional closeup details from "Forever Spring" (and yes, to bring this in even closer, press the control button (on the left) and scroll up!)


Labels: floral, fuchsia tulips, green, red, still life, white tulips
posted by Roxanne Steed at
9:17 PM
![]()


2 Comments:
Gorgeous flowers - I love this so much!
Thank you so much Connie!
Post a Comment
Subscribe to Post Comments [Atom]
<< Home